


1st Place
1st Place
2016 - 1st Place
"Waking Up in the Dark"
by Gabriel garrido - madrid, spain
From Gabriel:
This piece began with the search for new ways of texturing various objects together into one, but then grew and led to an idea that would reflect the awakening of those dormant talents in us. Freeing ourselves from the darkness that is working with and for the ideas of others. All in all, it is a wake-up call to the creativity in all of us.
My first tests were to achieve a lava effect, to do so I created a scene in Action containing 2 end-jointed cylinders forming the letter L, I reused the Position map of this scene in another Action in which I could apply textures that helped to create the desired effect, on the other hand I made an IBL together with 2 lightbox (GGXIBL) in order to create 2 new maps, one for lighting and one for specularity. Then, I worked with the images of the incandescent lava. Lastly, I merged Glows, matchboxes, Color Corrections, etc. and achieved the desired effect.
This test was the key that led me to create this piece. Following this, I let my imagination loose and thus created a scene where we can see a rocky landscape emitting lava at the setting of the sun, where creatures (our talent) come alive on nudibranch shape.
The first challenge I encountered was when I finished the lava. I had created a pipeline without any rules but that had to be respected for the other scenes. Despite the fact that during the intermediate steps the results weren’t as attractive, after the merge of the different treatments I could achieve the desired look.
In addition to all this process I should add that I encountered some difficulties when the project was well advanced. As a result, I had to migrate the project to 2017's version and some setups where affected by it, mainly the Action that generated the positions. These would randomly stop working so I was forced to duplicate them, enlarging the Batch.
The best of all has been testing and trying different techniques with Position maps, understanding the relationship of the RGB channels with XYZ position and finding your creativity sculpt in 3D.
I would also like to thank my fellow of Serena Sound, Alberto and Pepe by magnificent soundtrack.
2nd Place
2nd Place
2016 - 2nd Place
"This is the End"
by Olivier zibret - paris, france
From Olivier:
"This is the end"... What other name could I have chosen for my entry. I had no idea of what kind of title I would choose. I've found it the last day, when I was exporting the final version.
It is a mix of what's going on in my entry and the end of my One Frame Of White journey. Exciting, Inspiring, Challenging and stressful, but what a joy to have made it and what a joy to have finished it, because I still could have worked on it during months and months.
I had to work on it when I had time, during work when I could, after work and even during lunch breaks. I've worked on it during 3 months but I think 1 big month condensed.
I think that once you start working and having fun on this kind of project, it's difficult because you keep it in mind all the time and you want to only work on this project...
Even if people come to you and give you real jobs... I was like a child wanting to do nothing more than play with his toys. I'm kind of maniac with images.
I was looking at the OFOW website, like every day, when I started to think about doing something this year, trying to know if I could do something, because I was so impressed by what has been already released. So impressed by people like Greg-Paul Malone and Ivar Beer.
Finally, I said to myself (not what a wonderful world) but, why not, I have nothing to loose.
For my entry I didn't want to do just a technical demonstration but to do something more visual. I came up with this idea because at that time, I was working on a project on which I had to create a space shot, helped with the cg department. I had a lot of fun doing it, so when I started
to think of what I was going to do, I thought, why not doing a space shot entirely in flame!! 5 minutes later I was doing a linetest with two 3d spheres to quickly setup my shot.
It was pretty simple. A white Sphere for the sun and a grey one for the planet, nothing more, because at that time I wasn't thinking about the cosmonaut....
The most challenging things that I came across were the sun, the explosion and the cosmonaut.
For the sun I wanted to make a kind of realistic sun, so I started to search for references on the internet. I've used a lot of matchboxes. The idea was to generate different maps that I could play with and to use them as textures on my 3d sphere.
I generated many maps for my base texture and 5 or 6 in addition for my final sun. All animated and all 4k. Because I was starting my shot very close to the camera, I wanted to have details. My render time at this point was already heavy because of the 4k maps and my 1200 frames to render.
It took me a lot of time to play with every maps I did generate to be satisfied with the basic result. I didn't want my sun to look weird. That was the challenging part of my sun. When I was satisfied with the result I've played with a lot of colorcorrect, motionblur, edgedetect, glow, lensflares and rays nodes to find the final look of my sun.
Using another matchbox, I created the fire elements around my sun, using extended bicubics attached to a 3d sphere I did duplicate from my 3D sun.
There is a thing you won't really notice on the final render but I did enjoy doing it. At the very end, I did project the render of my sun on another sphere and with the help of a displace map, an atomize and a little expression, combined to a recursive op (a node that I really love and that I used a lot in this shot), I created a kind of atmosphere to my sun and little details to it. I had this idea thanks to my explosion.
For the beginning, I did use a fire preset in action, with a Z scale, reversed and modified with some motion blur, deform and color shifts.
When my sun was over it was easier to make my planet. I've used the same technic as my sun to create it, but with different maps.
The different thing is that I did generate a displace map and a specular map so my planet won't look to perfect, I wanted to feel some relief on it.
The next difficult thing was that I wanted my sun to explode and at the beginning, I had no idea of how I wanted to do this. I've tested things but wasn't satisfied with what I was doing.
And one day I knew how to do it. Remember that I love the recursive op? I used it to make my explosion. I did project my sun on a 3d sphere (again, I know but it was far before my atmosphere for the sun, I swear) and with the help of different displace maps and atomize combined all together with a recursive op and deform, boom! I had my explosion! I pretty love it! It's really visual and it's what I wanted.
The final thing that made me a little bit crazy was the cosmonaut. Again, I started with some researches on the internet to see the different kind of cosmonaut suits that existed to make my own cosmonaut.
I made the helmet with 3d basics geometries and 3d shapes with the help of some deform nodes. It was textured with substance textures.
The suit and the glove were created with displace maps that I designed and textured with diffuse maps based on the displace maps. Everything lit in action with lights, ibl from a pre-render and lens flares. This cosmonaut is very heavy to render.
Finally, the transition in the helmet was made with some deform nodes.
I think That without any pre-renders, my batch setup takes, at least, 4 or 5 hours to render.
It was very fun to do this OFoW challenge, you can really push your Flame/Flare very far, with your imagination as the only limit, because when you need to do everything in the software, you have to find solutions. You know your Flame better. You can experiment, try things you don't have time to try when you work with clients and take your time!!
I really encourage every flame artists to do the One Frame Of White challenge to push themselves in their entrenchments and really to explore things and even things you wouldn't have used for a specific task.
Finally, I would Thank the Flame and Logik community, REEPOST and Adrien Lepineau for letting me do this OFoW challenge, Thomas Bonnel my friends who is an editor and made me the sound design and my lovely wife who told me everyday that I was doing a fantastic job just to reassure me.
3rd Place
3rd Place
2016 - 3rd Place
"Bad Frame"
by drew downes - Syndey, Austrailia
From Drew:
Description
It's a short story about a frame of white who tries to sneak out of the program one night, gets caught and a chase ensues. Using the application UI as the stage and nodes and the villains, I wanted to use as many elements from the toolset (as props) to tell help the little guy get out. It's a bit of a tribute to Flame and I thought users might get a kick out of the little nods to the software like 'bad frame', nodes kissing and the villains becoming trash cans as they fall. Silly shit that you'd only get if you knew the software.
Inspiration
I just kinda went back to the original idea of 'what can you do with one frame of white?' Maybe I could create a character? I might even be able to cut shots together and make a story? I never really thought I'd end up with 28 shots. I went for story rather than getting bogged down with the look of it - there are far better crafters than me out there and people who can produce amazing results from Flame. Besides, I was having too much fun making up shots!
Challenges
The biggest technical challenge I would say was getting the character to move they way I wanted. The first thing I worked out was the run cycle. I figured If I could make it work, most other ideas I wanted to execute were possible. I created a hand full of key frames and just kept at it until it looked ok. The trouble was making it work to a speed that suited the style of character - I had to compress my keyframes so they didn't end up sitting on snaps, by far my biggest burden and I should have fixed it from the start. If I needed to slip the frames they all went haywire. I had to keep the characters subdivision simple so it wouldn't get too confusing to animate. There are definitely angles where the character looks weird and more than enough errors where he's crossing over himself. The next challenge was tying it all together. I made a separate action for each shot, knowing that I'd have to to stick it all together with mux nodes - more daunting than a technical challenge.
I have to say that I completed the entire project on my Mac at home. It was killer! It's not even a specced out trash can. Thank you so much for loaning me a OFoW license. I've had a ball! Very little sleep, but a ball none the less.
Cheers,
D
4th Place
4th Place
2016 - 4th Place
"VideA"
by adam paterson - sydney, australia
From Adam:
This was more of a personal project than anything. I didn’t really have a solid idea for this per se. I do enjoy reading through the threads of the Logik Facebook page but I always do leave with a mixture of both dread and inspiration. Dread because I have no idea what half of you are talking about and inspiration because what you do simply amazes me!
So I endeavored to use this contest as a chance to experiment with the array of tools Flame offers that I’ve never used. All those Grant Kay tutorials finally put to ‘action’ ha… It was mainly learning a lot about displacement maps. Displacing the crap out of anything. Then displacing it some more. But look into my setups and there was a lot of wacky stuff that didn’t make the cut.
I didn’t run into too many challenges albeit I didn’t know exactly what I was doing – I never do. The project kind of naturally evolved into this sci fi/retro audiovisual piece so I decided to roll with that (hence the name videA).
Kaleidoscope and Motif nodes then became my best friends. These took a bit of time before I could handle them smoothly and in a transitional manner. Also, sapphire glow (which I find much more appealing then the matchbox version), sharpen and Chroma warps were my besties.
But overall, it was just a great opportunity to experiment, experiment, experiment! It was definitely a learning curve for me and I certainly have a few more tricks up my sleeve, which I intend on using in the future. So honestly thanks to all those involved in this contest for the chance to grow my skills :-)
Cheers,
Adam
5th Place
5th Place
2016 - 5th Place
"OneFrameofWhite"
by Christian roos - Oestrich-Winkel, Germany
From Christian:
Firstly i'm fascinated from moving pictures that go camera move backwards from one take to the other seamlessly. Secondly my intention was to bring some illustrations interesting to the recipients eyes somehow. I tried to mix up these keypoints in conjunction with more or less actual issues (Prince and StarWars). The Illustrations i did by myself almost all with the "Paint-node" or "Gmask" or with a combination of both
For me it was the very first time to highlight pictures out of FlameAssist all started with one frame of white. I did start crafting this clip with Autodesk Flare but because i growth with Smoke and later Flame Assist i switched back to Flame Assist. I love FlameAssist and it's possibilities. I wouldn't never exchange it to any other software.
6th Place
6th Place
2016 - 6th Place
"Flameville"
by mihran stepanyan - yerevan, armenia
From Mihran:
This is an experiment where I tried to do a whole work in 3D using Flame Premium new opportunities. The main goal for me in this project was to get the needed result using only Flame Premium tools and some of the matchboxes without using any third part plugins, textures, 3D models,etc.
All 3D models were made in Flame using 3D shape and Flame primitive geometries. The textures are Flame native substance textures.
Flame 2017's new technologies were very helpful for this project, because they made the work faster and easier, and let the usage of the shaders and effects in action node.
This project was a story about my love to Flame, and I hope that anyone who sees this little clip will fill my gratefulness.
Best Regards,
Mihran Stepanyan
Honorable Mention
Honorable Mention
2016 - Honorable Mention
"Fatherhood"
by miles essmiller - los angeles, usa
From Miles:
Fatherhood came about during an extra gnarly battle with my oldest son. The kid is super gifted and mad skilled, but like most gifted people he can be seriously intense. My piece for One Frame of White is meant to depict him through my eyes. From his birth through his intellectual leaps and emotional explosions. Building up and tearing down and building back up again. In the end though he always comes out a diamond.
Upon taking up any challenge I like to impose limits on myself … just for fun. For this One Frame of White I gave myself the following challenges: No Sparks, Presets, or Shaders :), Keep at 15 seconds or less, and complete in a weekend. I got em all except for the under 15 seconds, oh well.
I didn’t want the piece to be visual effectsy, I also wanted to create something that looked easy, andthat maybe made people a little uncomfortable (convey the intensity I feel). Also I’m a fan of minimalist and constructivist art, a bit obsessed with geometric shapes and heavily inspired by Kandinsky’s Point and Line to Plane. So I kept in that realm… kinda. The only execution type thing i needed to figure out was how to procedurally give color to something only if it was in motion, and do this without a shader. In the end it was simple and a bit silly, branch off 3 mux nodes, offset one to -1, one to 0, and one to 1 and run them all through a combine. I really liked what this very simple thing did overall and was surprised at the effect it had on the smoke.
Lastly the track, and I know I know music does not come into consideration, but I’ll talk about it anyway. I love this guy https://uton.bandcamp.com, but trying to edit something to his work is brutal. It is very easy to underestimate how hard it is to find a real repeating pattern. Funny enough this was the hardest part, compounded by the fact that I refused to edit outside of batch.
Anyway, thanks.
-M
Honorable Mention
Honorable Mention
2016 - Honorable Mention
"Lonely Planet"
by shinichi ishikawa - tokyo, japan
This is a 360 video, best viewed in the YouTube mobile app or in a chrome browser.
Honorable Mention
Honorable Mention
2016 - Honorable Mention
"Alien Aquarium"
by ray bohn - los angeles, usa
From Ray:
A description of my project: The sea has secrets, and an Alien Sea has terrifying secrets.
How's that? (It's odd that sharks can be found in alien seas - who knew?)
I've always liked playing with the 3D objects in Flame, it's kind of like snapping together Legos. I wanted to tell a little story with some kind of surprise ending. I was fooling around with some cool Matchbox Shaders and found Crok-Mandelbox made a really great looking reef environment, and Crok-Mandelbulb made some pretty freaky looking fish. I went with it and ended up with what you see here! I need to learn more about ambient occlusions and shadow casting etc, but you can clearly see that! I did have a few crashes, got help from the Logik folks (thanks again!), and had some grief trying to upload these huge files, but all in all it was a blast!
Thanks!
Honorable Mention
Honorable Mention
2016 - Honorable Mention
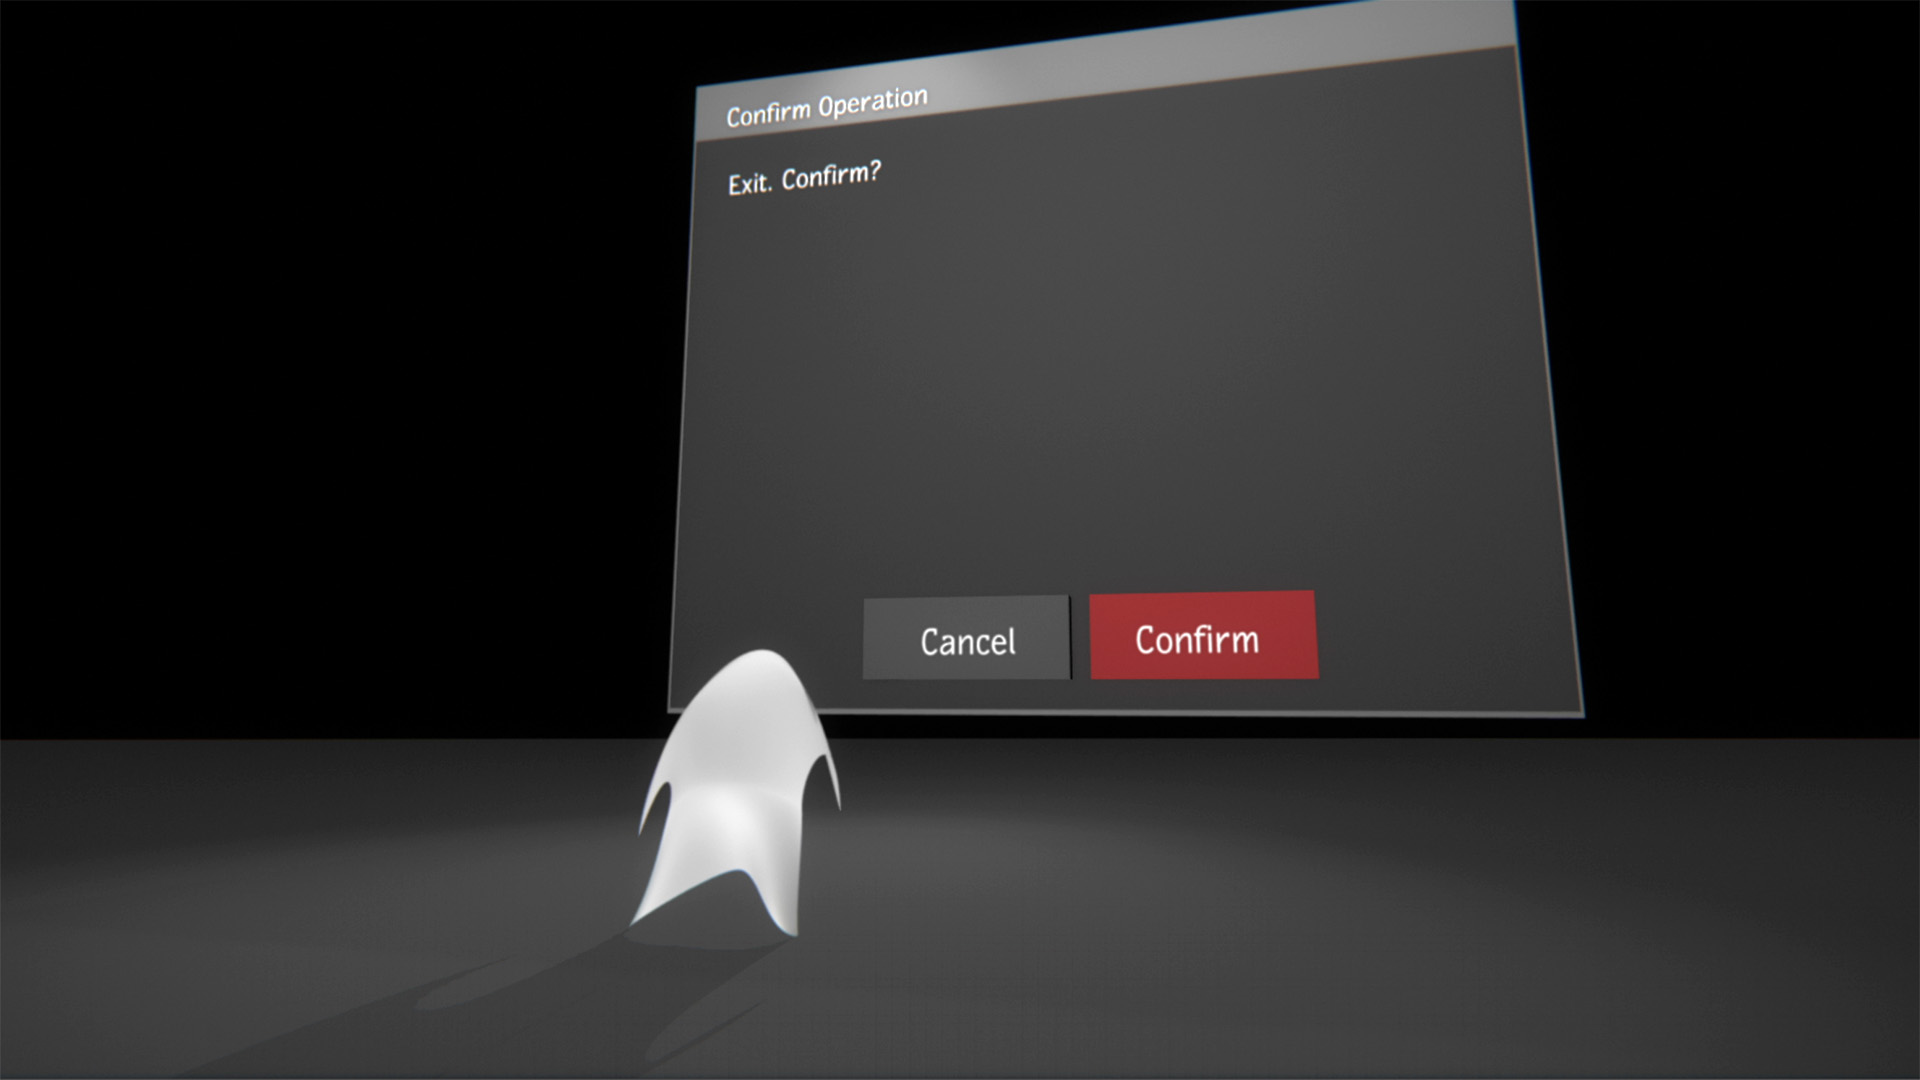
"A Day in the Life of a Flame Artist"
by joel osis - toronto, canada
From Joel:
For my entry I just wanted to step away from creating something visually stunning and wanted to shed light that sometimes story reigns supreme, I mean we all work on jobs that we won't ever put on our reels but sometimes the story is what makes it fun to work on.
I also wanted to touch on the fact that sometimes we deal with crashes using this piece of software when we are under the gun:)
The main work for this was in making the UI for the Mac OS and then the recursive ops for the end gfx card issue that we all have seen on the linux side.
Really after using the text tool both 2d and 3d I realized again the text tools are indeed in need of an update.
This at its core is a shoutout to all the fame guys who are fantastic artists but a lot of the time are fighting not only the client but sometimes the software itself.
2016 Entry
2016 Entry
2016 Entry
"Gallery"
by David oosthuizen - cape town, south africa
From David:
I'm based in Cape Town, South Africa.
Problems faced in the project - biggest one was probably procrastination and then rushing last minute to get something done!
The gallery vibe came about as a solution to wanting to tie together various little experimental scenes I had made and as a method of stress testing Flames new reflection shenanigans.
The scenes are focused on exploring the generation of displacement maps in flame to rapidly create interesting 3d geometries in an organic way.
Cheers
2016 Entry
2016 Entry
2016 Entry
"I'm Batman"
by John fegah - dallas, usa
2016 Entry
2016 Entry
2016 Entry
"Flame Space"
by joginder singh varna - mumbai, india
From Joginder:
I am based in Mumbai city in India. I work as HOD of Flame Department for Viacom18 Media Pvt Ltd., where I am looking into online and packaging work for MTV, Vh1, Nickelodeon, Sonic, Comedy Central.
About the Project:
Originally the idea is a little tribute to Autodesk for making such a powerful software.The idea for this project is all about we 'Flamers' have our OWN SPACE where there is Sunny side and Furious side, so better do not mess with the Flame Artist ;)
Since the addition of more robust 3d environment in Flame, I always wanted to do something different with it, so here I got an opportunity to use it creatively in the process. I did some storyboarding and made some rough concepts for the idea. First I was thinking to keep Rocky Flame Structure on the suspended mountain from the beginning but while progressing forward I thought since it is a little tribute to Autodesk I thought it will be great idea to start with Autodesk and then move into Discreet and then it turns into Flame.
I did some tests by importing default 3d geometries into Action and tried giving the camera motion to the scene. It resembled to my stoaryboard and i was happy to see the test. Next I started thinking how to create anti gravity mountains this problem got tackled by Substance Texture in Action and Deformation Tool which I used extensively to shape the mountains and stones floating along. My favorite tool Replica I used it extensively in the process it helped me a lot to scatter the stones.
While staging this I had used cast shadows which were looking very beautiful but it was becoming very difficult to control it when the camera rotates other side, so eventually I had to minus it when the main camera rotation was happening. Creating the 'Node Icons' was real fun, I took pictures of the nodes on my phone and then created them. I did the same for the autodesk logo as well, used gmask and gradient tool to create it.
This entire piece is done in just one setup and as I was working on it I kept in mind that I have to keep renders easy and faster so I avoided using photo-realistic effects. I took help of proxy to work faster and render quickly to see the animation progression. It took me 1 hour and 57 mins to render this entire piece.
Finally it was so much fun to just watch the final render. It started out as just some sketches which turned into something that I actually enjoyed working on.
Lastly a big thank to the LOGIK group which have so many talented and humble people. I am really happy to be part of it, I just love this group and community.
2016 Entry
2016 Entry
2016 Entry
"Paper Airplane"
by james emmerich - new york, usa
From James:
"When I was first considering ideas for the One Frame of White contest I wanted to focus on the essence of a single planar surface of white. The first thing that came to mind was a paper airplane. Not only because it's one of the most common objects made from one flat sheet of paper but also because it has the capability to take you on a journey. And because it's much simpler than trying to create origami from extended bicubics.
I also really enjoy visuals that take you through different environments without being jarring. As though you don't even realize it's different until you are in it. That idea had a strong influence on what I created.
A lot of the challenges I ran into along the way had to do with rendering and keeping the project light enough to still be creative. I built the sequence in sections. Most of them are pretty easy going so I was able to be more creative in testing out different ideas; for example, how the camera moves around the folding plane. The middle section, which is the longest, became something of a monster that I had to corral more than control. After a certain point it was more about accurately executing alterations blindly because previewing and rendering was just too time consuming. Looking back I think I wouldn't have created such a large 3D environment for that scene. I should've tried to create the same large scale feel in a smarter, more efficient way. Overall I am very happy with the result though"